Kit Number - 1108
Welcome to Introduction to the Microscope lab! Use the navigation at the top ↑ to move throughout the lab. Please click on
to start the lab!
Welcome to Introduction to the Microscope lab! Use the navigation at the top left ☰ to move throughout the lab. Please click on
to start the lab! 
| Learning Objectives |
|---|
|
Microbiology is the study of microorganisms. Microorganisms are organisms that are too small to be seen with the human eye (Figure 1). This is a huge field for such small subjects. There are many times more microorganisms on Earth than all the other organisms put together. It is estimated, for example, that in the human body alone there are 10 microorganisms for every one human cell. That means that 90% of the cells found in the human body are not human!
There are many other objects besides microorganisms, such as biological structures, that cannot be seen with the human eye. What types of objects can you think of that cannot be seen without the aid of some magnification? Biological structures might include a valve found in a vein that prevents blood from moving backwards or the cells that make up a multicellular organism. The fact is that there are an unimaginable number of objects that we cannot see with the naked eye.
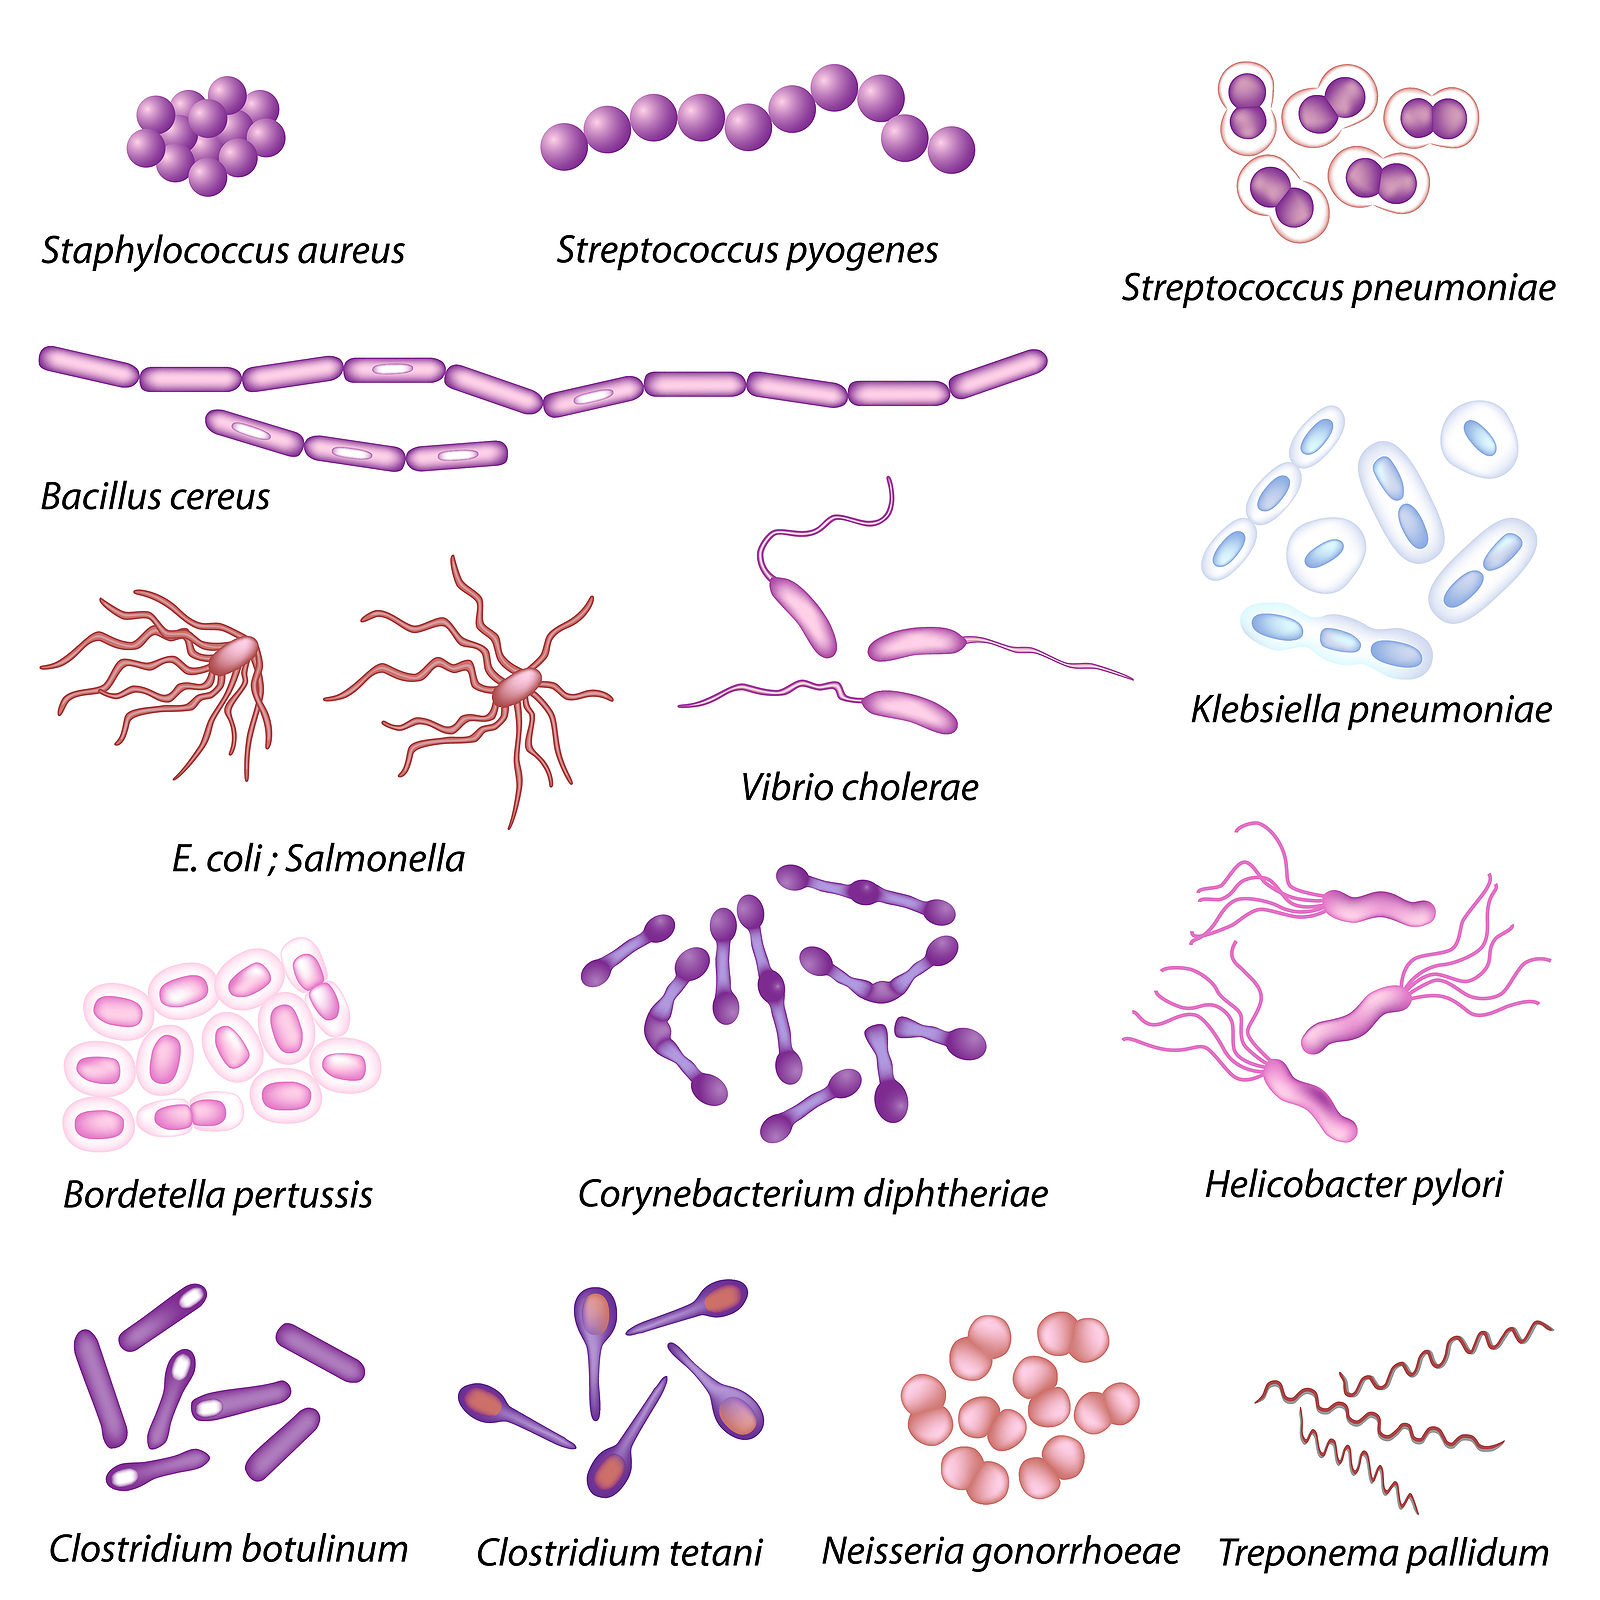
Figure 1: Bacterial species exhibit differing shapes.
Microscopes are used for the visualization of objects too small for us to see. There are many types of microscopes that range from low-level magnification (e.g., hand-held magnification lens) to mid-level magnification (e.g., compound light microscopes) to very high-power magnification (e.g., an electron microscope). The type of microscope that is used depends on the application. For example, if you were trying to locate and remove a small splinter from your finger, a hand-help magnification lens (magnifying glass) would be extremely helpful. If you wanted to examine the structure of a tiny virus, you would need an electron microscope.
Magnification is one characteristic to consider when deciding what type of microscope is needed for a particular application. The other key characteristic is the resolving power. The resolving power refers to the ability of a microscope to show detail. Having a device that can greatly magnify an object is helpful only if the magnified object is well defined (not fuzzy). The resolution is largely dependent on the wavelength of light used. Shorter wavelengths produce higher resolutions. Light microscopes use visible light and electron microscopes use a beam of electrons that travel in wavelike patterns. These waves are 100,000 times shorter than visible light waves! Electron microscopy can therefore be used to visualize extremely small structures.
The compound light microscope is the most commonly used type of microscope. The name compound refers to presence of more than one lens. The use of these microscopes can be traced to the late 1500s. The early compound microscopes could magnify objects up to about 10X (this means 10 times). In the 1600s a Dutch linen merchant, Antonie van Leeuwenhoek, greatly improved upon the production of lens and was able to create microscopes that could magnify objects 200X. He observed and recorded many types of microorganisms with his microscopes. Because of this, van Leeuwenhoek is frequently referred to as "the Father of Microbiology". Modern day compound light microscopes can typically magnify objects up to 1000X.
A representative compound light microscope is shown in Figure 2. Note the two sets of lenses:
Along with a light source, these lenses work together to magnify the object being viewed. In the case of the compound light microscope, the total magnification is equal to the magnification power of the ocular lens multiplied by the magnification power of the objective lens. For example, if the ocular lens magnifies 10X and the objective lens magnifies 10X, the total magnification is 100X.
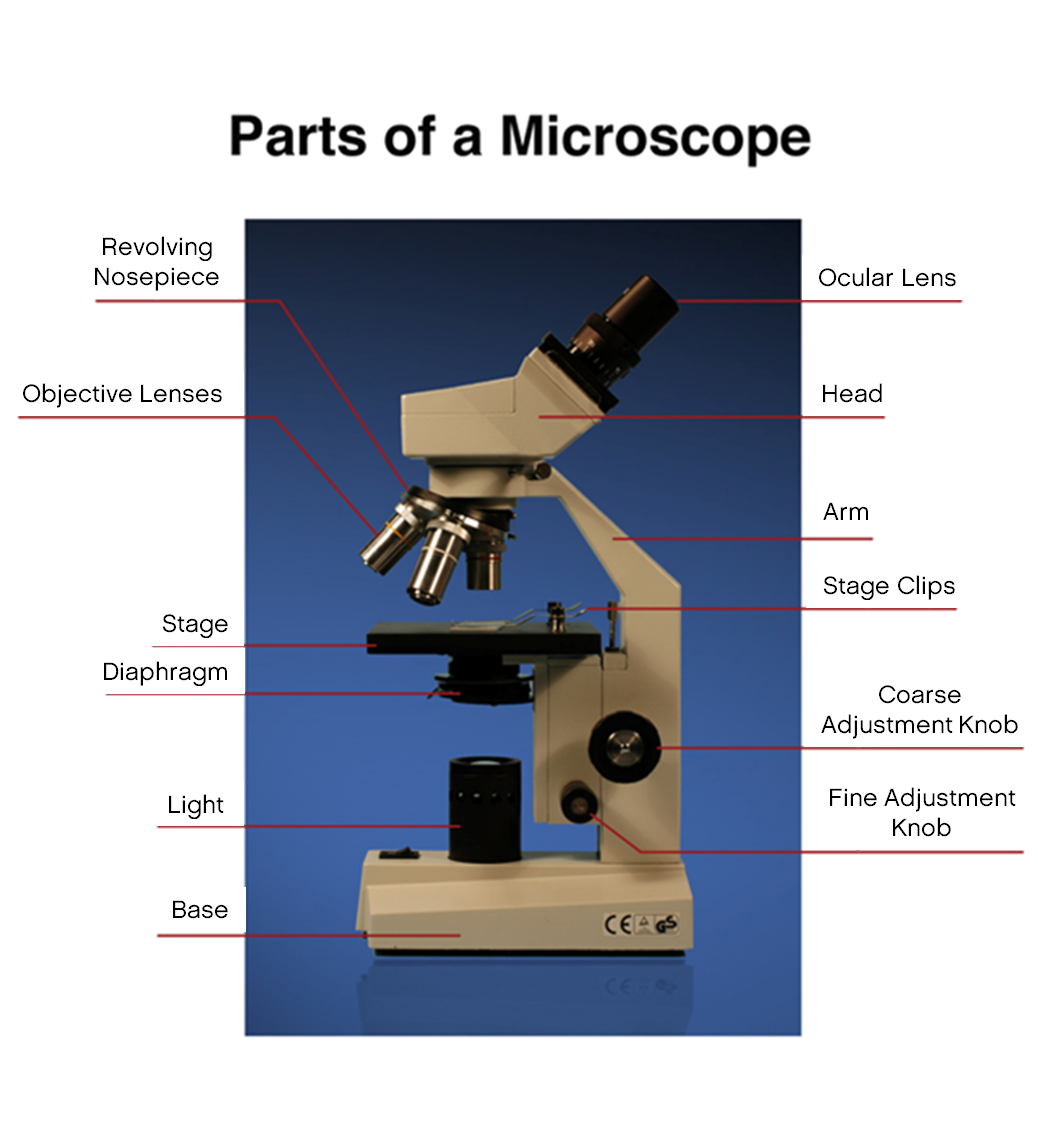
Figure 2: Diagram of common features on the compound microscope.
Below is a list of the parts of a compound light microscope. Refer to Figure 2 (above) as you read through this list to familiarize yourself with these parts.
The following steps describe the proper use of a compound light microscope.
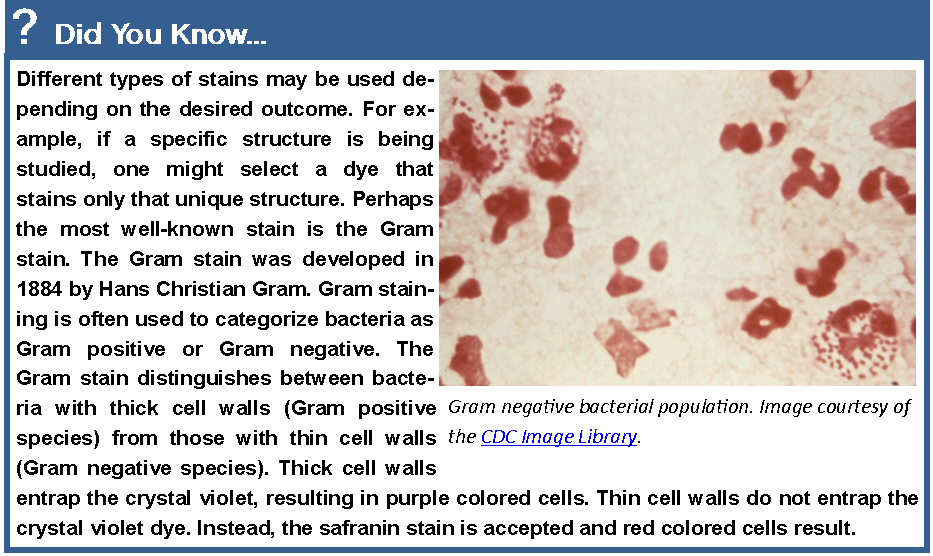
Proper specimen preparation helps produce the best visualization possible with any microscope. Glass slides are used to contain the specimen. Live specimens are usually prepared as wet mounts. In wet mount preparation, the specimen is placed on the slide and a much thinner glass cover slip is placed on top of the specimen. Samples are frequently heated to simultaneously kill and fix (secure) the sample to the glass slide. Fixed samples are then stained to enhance the observable contract between the cellular features.
this page requires the Flash 6 plug-in


©University of Delaware.
This work is licensed under a Creative Commons Attribution-NonCommercial-NoDerivs 2.5 License.
difficulty viewing text? Open Virtual Microscope in new tab
Experiment 1: Virtual Magnification
Experiment 2: Virtual Microscope
